

帯揚
帯揚は、帯枕にかぶせて帯枕を隠す布です。銀座結びや半巾帯の時は帯枕はなくても、帯の上線を整えたり、止めたりするのに使ったりします。
また、着物のコーディネートのポイントにもなります。
大きさは、およそ 25×160㎝前後。
素材は、絹、ポリエステル、麻などいろいろ
絹 シルクの艶があります。
麻 洗えます。シャリ感があり、夏に最適です。
ポリエステル 洗えます。
礼装の留袖には白。振袖には総絞りが比較的使われる感はありますが、他は自由にコーディネート。
夏物の絽や紗は6月~8月、温度では22℃くらいから使用の目安と言われていますが、まずは自分の体感と感性を大事に楽しんでください。
好きな布で手作りもできます。
obiage
The obiage is a cloth that covers the obimakura(帯枕). It hides the obimakura(帯枕).
When using it for ginza-musubi(銀座結び)or hanhabaobi(半幅帯), there is no obimakura(帯枕)so it is used to obi(帯)and stop the obi(帯).
It is also a point of coordination in front of kimonos.
The size is about 25 × 160 cm.
The materials are silk, polyester, hemp, etc.
Silk It has a unique gloss of silk.
Hemp Hemp can be washed. Ideal for summer.
Polyester Polyester can be washed.
White obiage is used for formal tomesode(留袖). Relatively, furisode(振袖) uses a lot of sousibori(総絞り)-obiage.
Other than that , you can coordinate freely.
In summer, there are obiage such as roast(絽) and gauze(紗). Approximate, period June to August. Ues from 22℃ at temperature. But please take good care of your body`s senses and sensibilities and enjoy them.
You can also make it with your favorite cloth.
結び方 How to tie
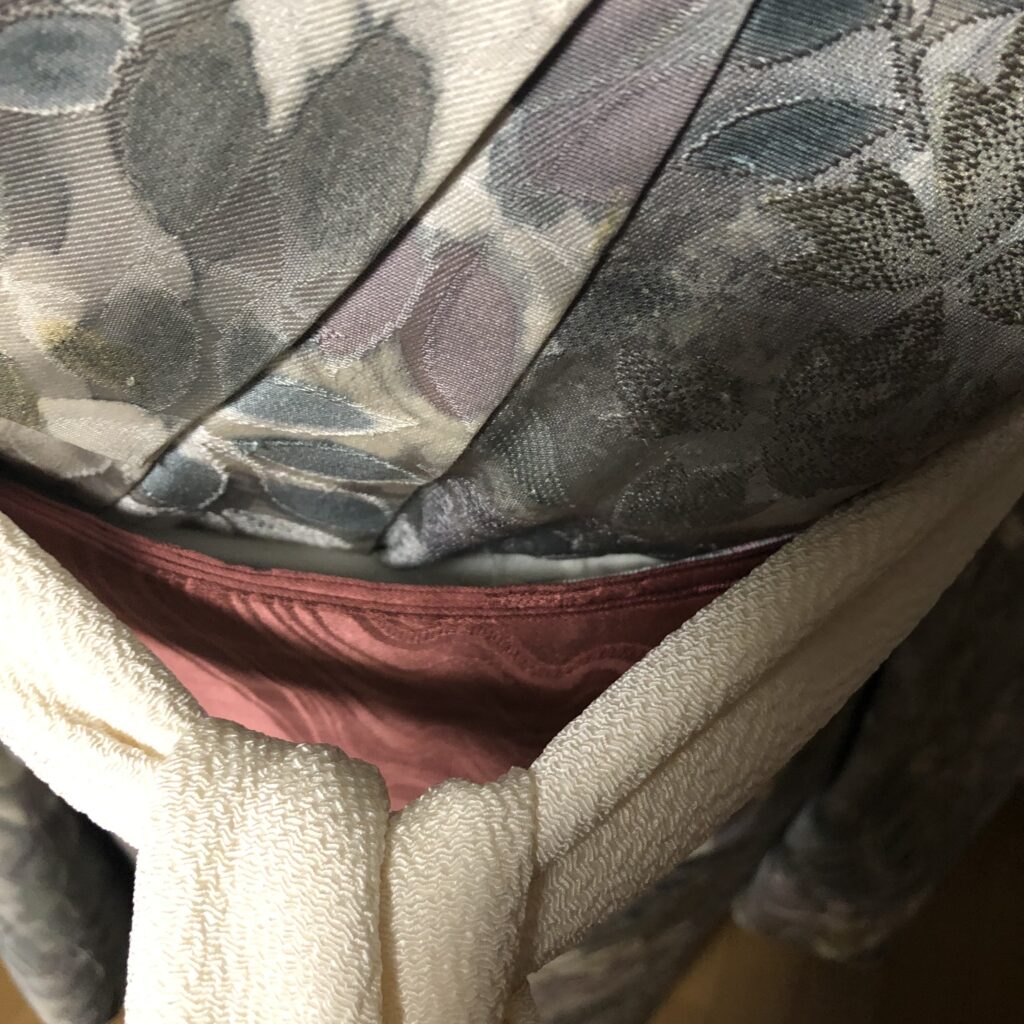
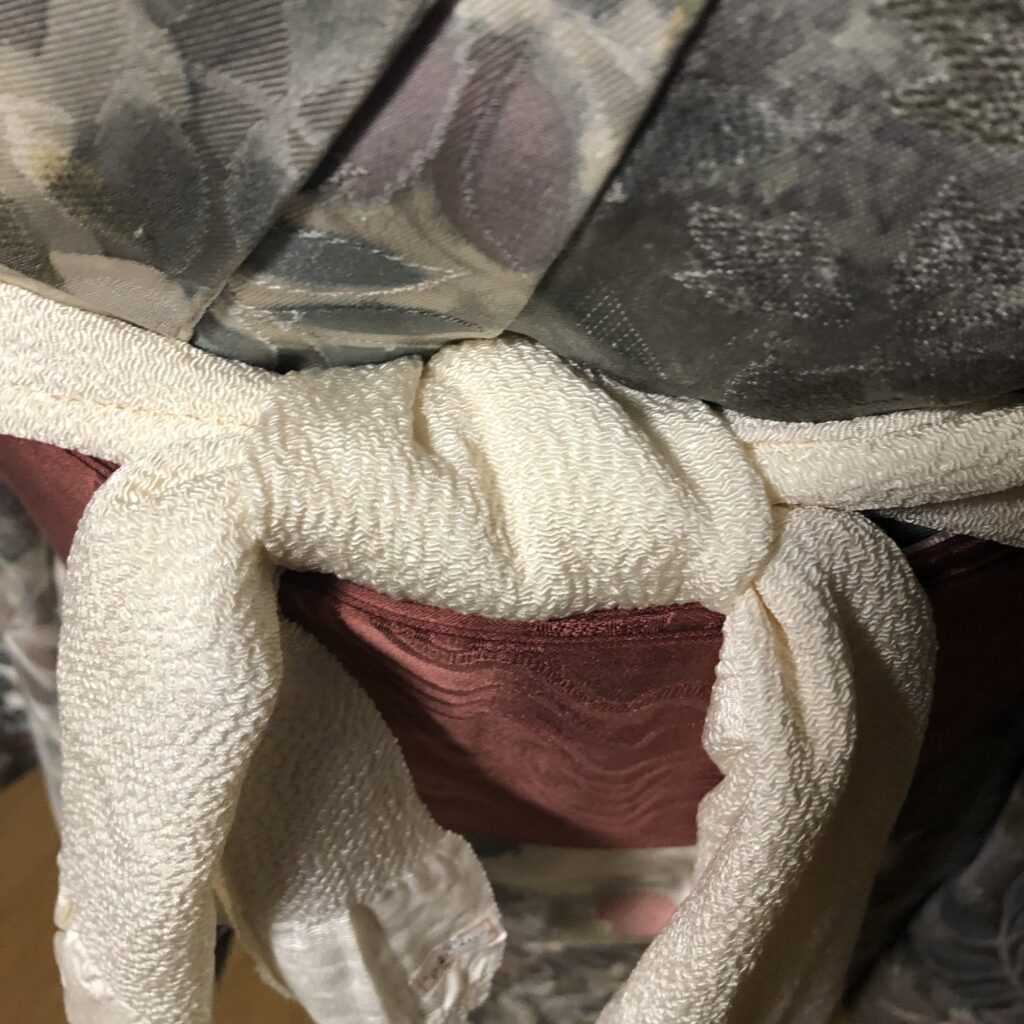
帯枕に巻くようにかぶせます。
I will wrap it around a obimalira(帯枕).
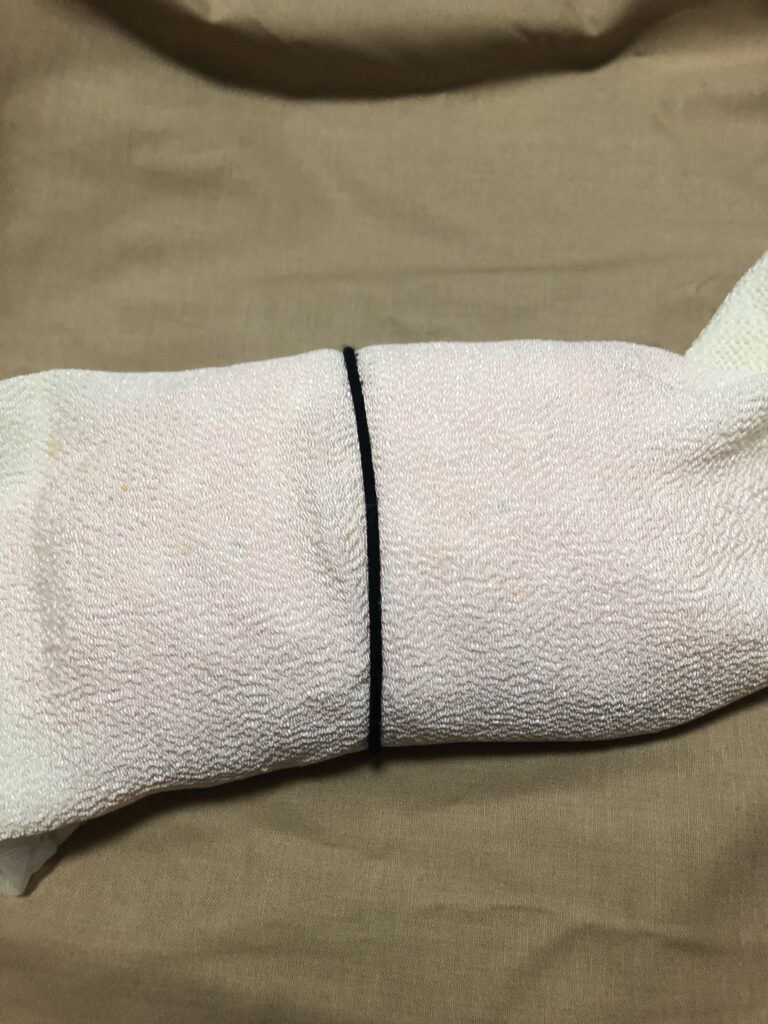
ゴムで止めます。(ゴムは平たい方が帯に形が出たりしません。)
I will fasten it with a flat rubber.( The rubber in the picture is not flat. I am sorry)
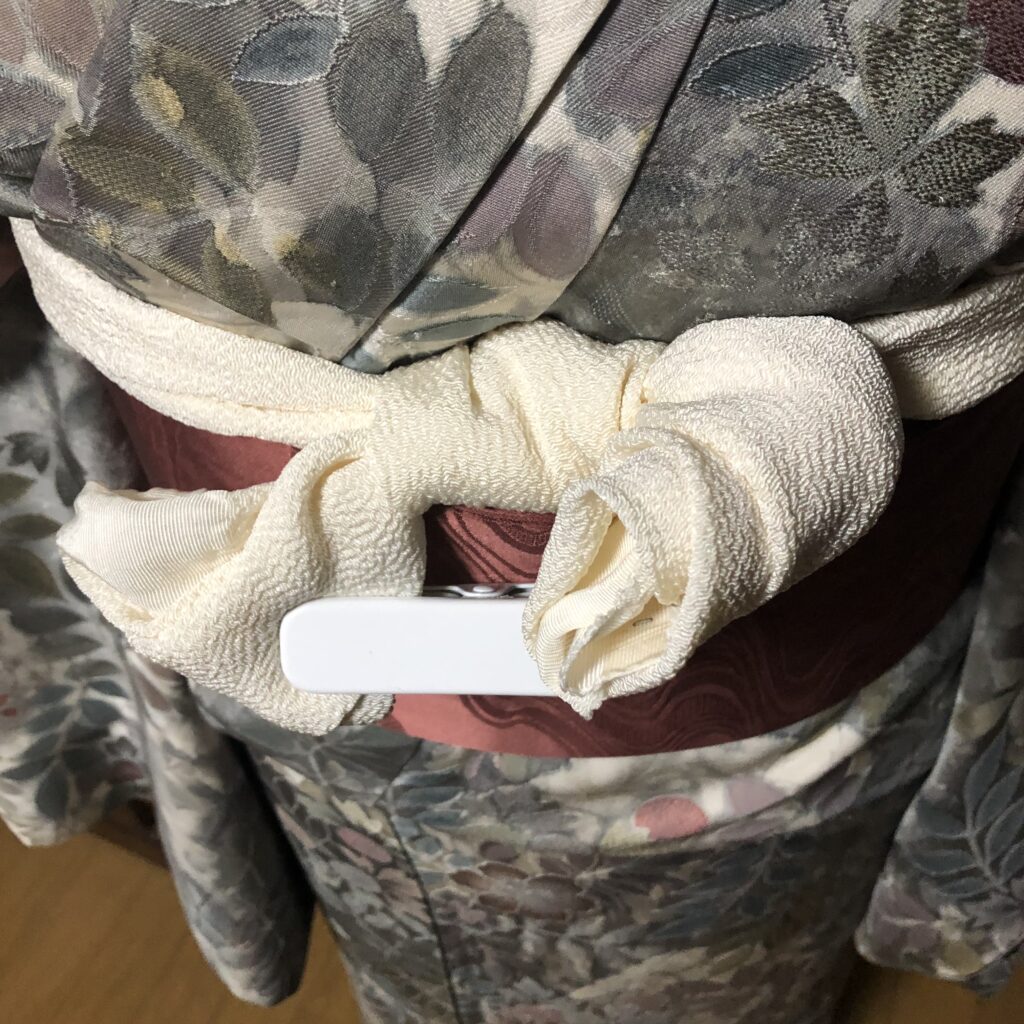
前で三つ折りにします。私は、上、下の順で三つ折りにします。これで幅が3分の1になります。
I will fold it in three in front of my kimono. I fold it in three in the order of top and bottom. This will reduce the width of the obiage by one-third.
それをまた二つ折りにします。折った方を上にするので下が二枚になってます。それで幅が6分の1になります。
Furthermore, fold it in half. The folded cloth side is above.
片方出来たら帯に挟んで
I will put the finished cloth in the obi(帯).

反対も同じようにします。
Fold the cloth on the other side in the same way.
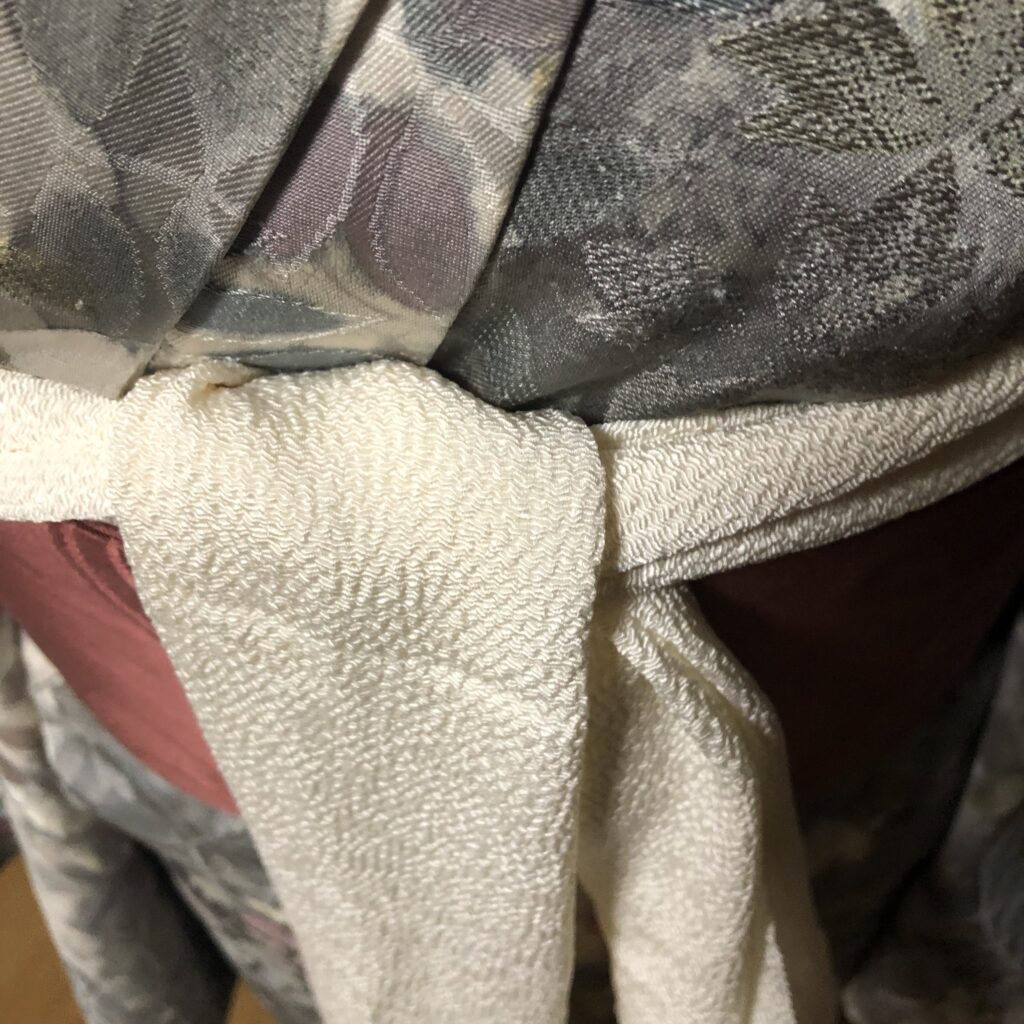
左手の帯揚を上にしてひとむすび。
Place the left cloth on the right cloth. I will tie it up once.
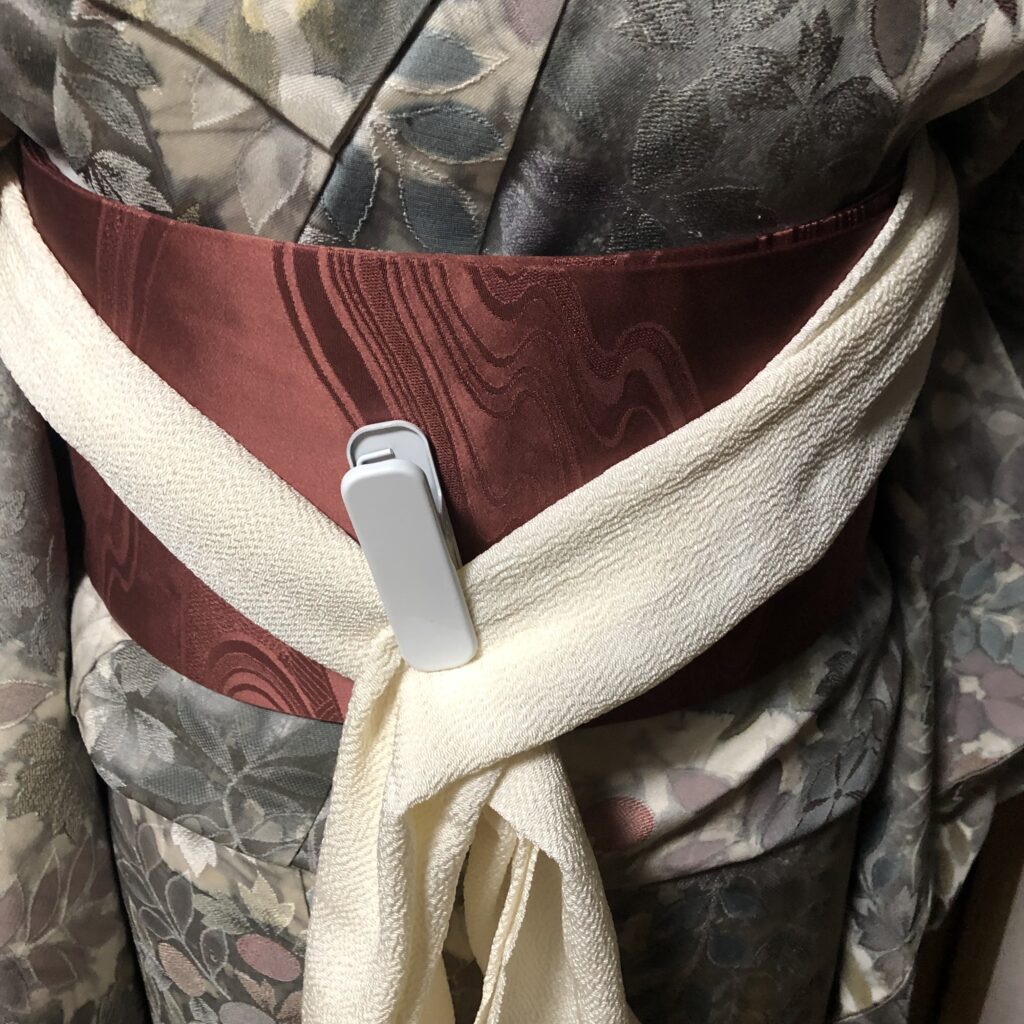
帯に帯揚が乗ってないか手を帯揚と帯の間を通して確認。両方とも。
Do not put an obiage over your obi(帯).Slide your fingers between the obiage and the obi(帯) to check.

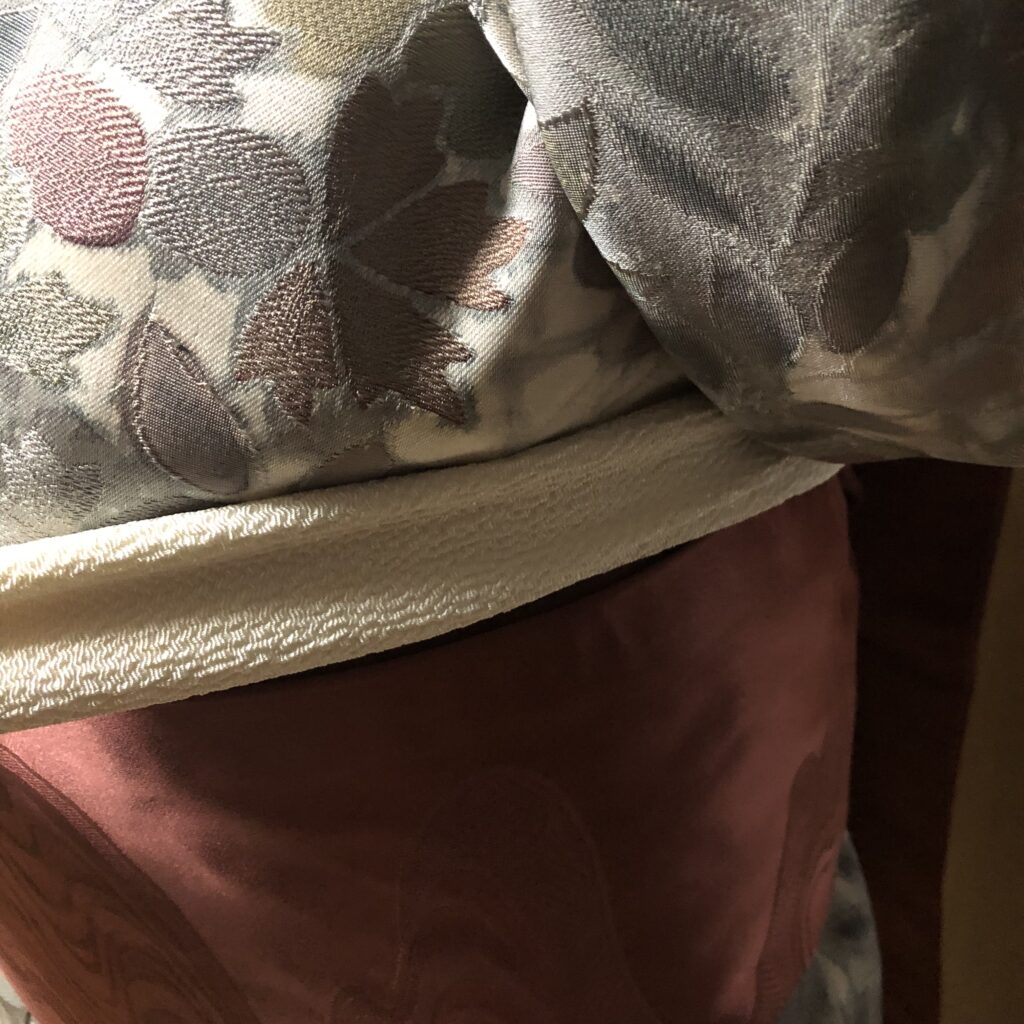
帯に乗っていた帯揚をきれいにすると、これだけ余りがあるので、もう一度結び目と体の間にスペースがないように結び目をキュッとします。
If you do the above action, there will be excess obiage , so tie tightly again.
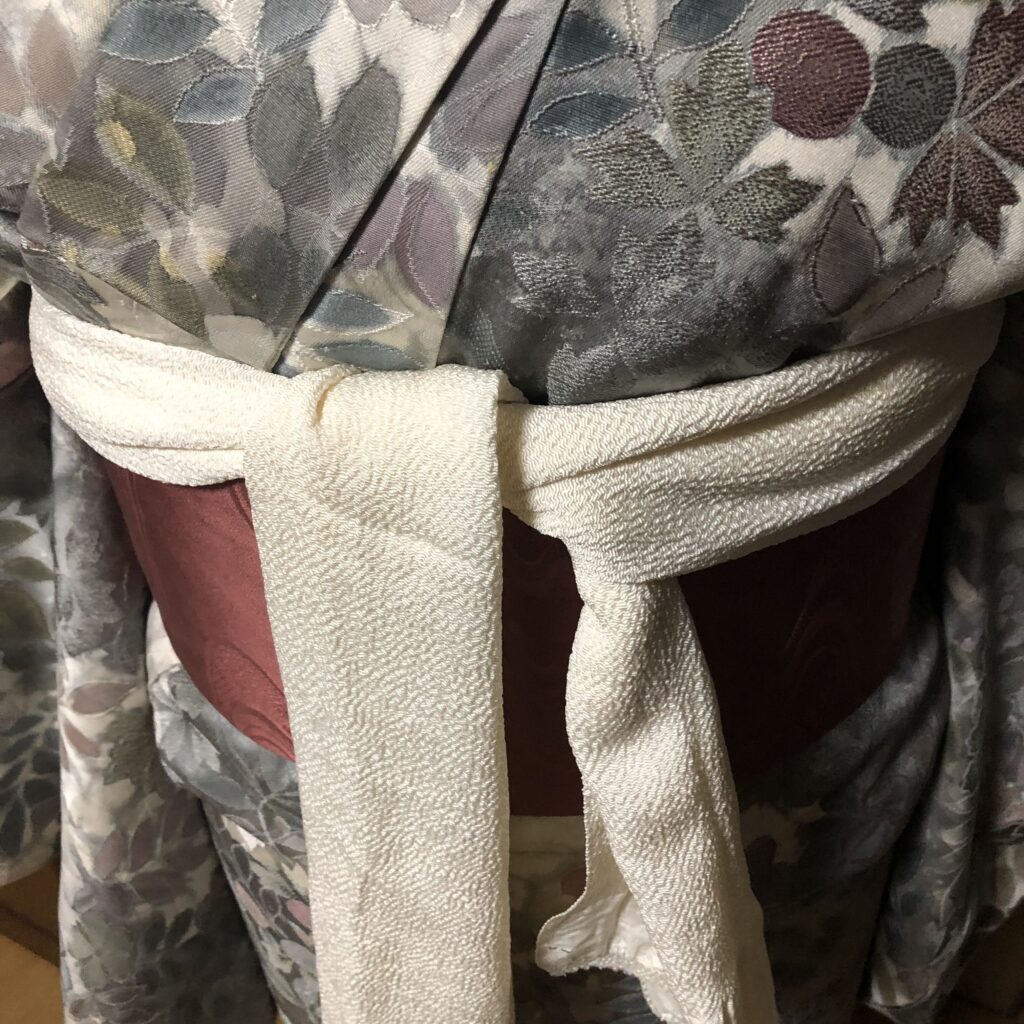
上の帯揚(右手)をきれいに見せたいので、ふっくらと下に向かって輪を作ります。
I will arrange the top obiage so that it looks beautiful. And I will make a circle down ward.
その輪に下(左手)の帯揚を通します。
Put the other obiage though the loop.
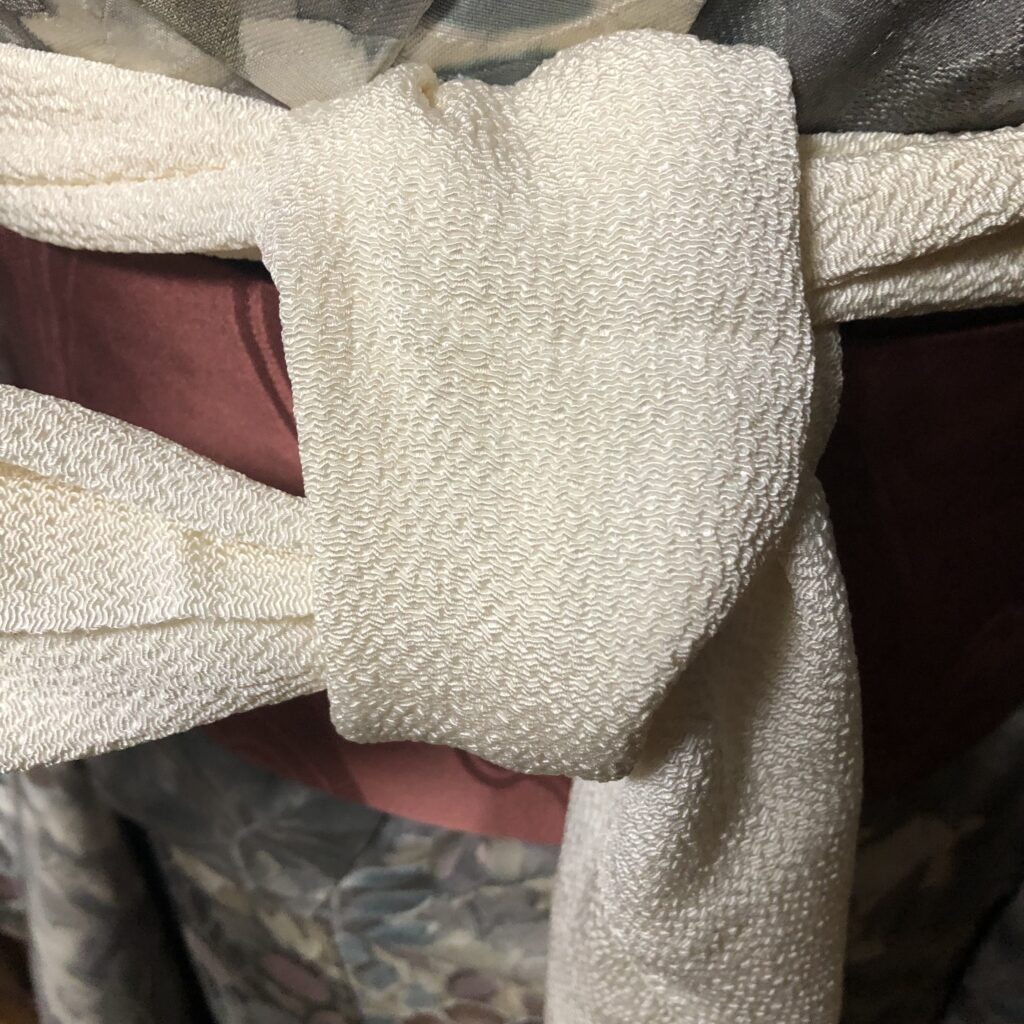
右にきた下の帯揚はキュッと。上になった帯揚はフワッと結んでいきます
Tie the bottom obiage tightly. Tie the top obiage so that it look beautiful.
結べたら余りの処理ですが、余りはみえなくなればいいので、クルクルして帯に押し込む。
The remaining cloth is treated, but it is wound from the end and collected in a obi(帯). Push it into the obi(帯).
クルクルしないで、均等に帯の中に入れるなどの方法もあります。
自分の帯の中が苦しくないようにしていただければと思います。
In addition, it can be pressed evenly into the obi(帯) without winding.
Push the obiage in so that you do not feel uncomfortable.
出来上がりです。心持ち結んだ所が下がるようセットします。

帯揚は結べるようになるといろいろこだわりが出てくるところでもあります。いろいろ試されると面白いと思います。
When you get used tying obiage, you will be enjoyed about tie and how to show. It is good to try a lot of things.
最後まで読んでいただきありがとうございました。
I am sorry for my poor English.
Thank you for reading through to end.